INTRODUCTION:
Although Unreal Engine is getting a lot of attention lately, specially after ILM showcased how The Mandalorian was shot using UE and led walls, some of us already saw its potential a few years ago. In my case, I started getting interested in the software and its potential uses once Nvidia announced its RTX cards and the possibility of having realtime raytracing on the GPU back in 2018. In summer 2019 and while trying to get familiar with Unreal I finished a demo reel crafted around lighting, and the intention of this post is to breakdown the lighting approach in one of those shots hoping that someone might find it useful.
OLD HUNTERS MANOR LIGHTING BREAKDOWN:
Although the shot was done in UE4 4.22, I think the lighting approach could
definitely be applied to any 3D software or even 2D painting.

BUILDING UP THE SCENE:
I personally think that images should tell stories, regardless if those are moving pictures or static ones and that idea got instilled even deeper after having worked at Pixar for a few years, where every aspect of the production process is there just to support the story.
When I started thinking about the shots that could conform the reel, I followed the same approach and I tried to tell a small story, or at least part of it, with each one of them. To me, it has always been important to have characters in the shots I do, rather than simply working on a lifeless nice environment because it helps me building those little stories, so I needed to find both, a nice environment as well as a character that could fit into it.
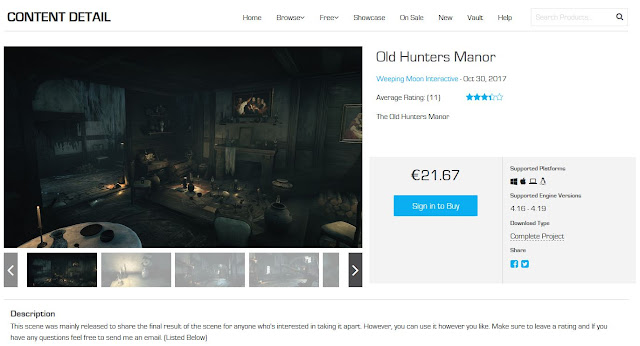
In this case I found this appealing environment during a special
give away from its creator Moses Saintfleur, to promote his course about
creating environments using Unreal (https://nomoregrid.teachable.com/).
Although it seems that the offer ended up a while ago, you can still buy it
in the marketplace.
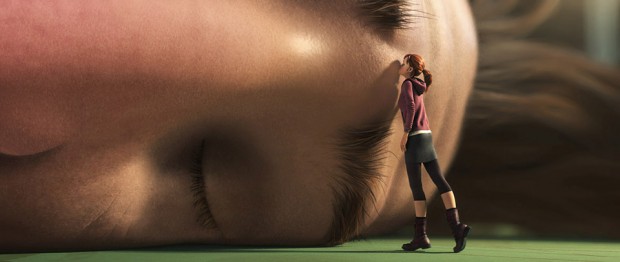
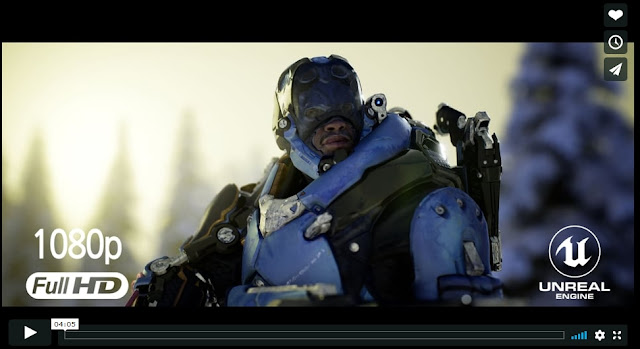
I also thought, that one of Epic's free Paragon characters called the
Revenant could make a good fit in the environment, since both of them had a
western flavour.

Scouting the location I found a very cool room, kind of hidden in the house
and full of books, so I decided to create two shots, the first one with the
Revenant having entered the house looking for something, and the misterious
room containing the book that the Revenant was meant to be looking for.


IMAGE COMPOSITION
After scouting the house, I found that the main entrance was giving me enough ingredients to build the shot. In order to create a nice lighting finding a good balance between lit and dark areas as well as soft and hard light sources is very important.
After scouting the house, I found that the main entrance was giving me enough ingredients to build the shot. In order to create a nice lighting finding a good balance between lit and dark areas as well as soft and hard light sources is very important.
In this case I had a door that I was planning to
open and that could justify a strong sun light coming through, as well as some windows in the background that would help getting some soft light
from the sky inside of the house.
At the same time, that point of view offered different planes of depth, with foreground, midground and backfground elements that would definitely help with the composition and mood of the scene.
Another creative decission I made very early on was the image aspect ratio, choosing 2:39 to resemble those spaguetti western films shot in the 60s.

POSTPROCESS VOLUME SETTINGS
First thing I do when starting a new level is to create a post process volume node. Since the scene I was dealing with was relatively small, I didn´t even care about making it fit around the geometry, and I just selected the "unbound" option so that the post process was applied to the whole environment.
In order to avoid getting distracted and misleaded by any post process effect, I always disable all of them but the tonemapper, which I never modify. If I want to add any color correction to the image I do it through the color grading attributes.
Something that is specially annoying to me is the eye adaptation, so I not only disable it in the viewport but also in the post process volume, by setting both the min an max brightness to one.

BLOCKING OUT LIGHTS
Opening the main door and letting the direct sun be the main light source was already creating a nice balance between areas being lit vs the ones in the shade. Following with the storytelling, placing the character in front of the main door was kind of explaining that he just got in the house and I also placed the character in the right third of the image, with his head in the intersection of the horizontal and vertical axis. Very basic composition stuff by the way.

Opening the main door and letting the direct sun be the main light source was already creating a nice balance between areas being lit vs the ones in the shade. Following with the storytelling, placing the character in front of the main door was kind of explaining that he just got in the house and I also placed the character in the right third of the image, with his head in the intersection of the horizontal and vertical axis. Very basic composition stuff by the way.

INDIRECT LIGHTING
With such a strong sun light coming through the door, it was important to get a nice indirect lighting bouncing around that area. Although I could have multiplied the indirect lighting intensity of that light, I decided to crank up the light intensity until I got something that was looking right exposure wise, even knowing that some areas of the image were overexposed.
Since that shot was done using version 4.22, I took advantage of the raytraced GI so that I could dial in the light intensity in real time before baking it with lightmass. Indeed one of the things I that I found quite shocking when I started learning Unreal with version 4.20, was not being able to preview the GI, and having to go through several slow bakes before getting it right. On those bakes I couldn't even rely on lower baking settings since the look was changing so much that was useless.
For someone like me with quite some experience using offline pathtracers that
provide full raytraced preview images within seconds, not having that same
capability was nothing but shocking. Thankfully UE4 4.22 made a huge leap in
that regard, although I have the feeling that lightmass, the new pathtracer,
and the raytracing GI each give different results. I will try to run more
tests on that matter.
Along the same lines, while being able to modify the intensty and color of a
stationary light is very nice, it becomes useless once you introduce indirect
lighting in the equation. Increasing the light intensty and color but not
having the indirect lighting updated ends up creating incorrect images.
Besides adding the post process volume node, I always add a lightmass importance volume to the scene to capture indirect lighting over moving elements. In this case in order to get a faster baking process, I adjusted the boundaries of the node to whatever was visible in camera and I also reduced the volumetric lightmap detail cell size to 50, to make sure I was getting enough indirect lighting information.

In order to have proper indirect shadows, I also enable the capsule indirect shadows in the character´s blueprint, so that I could get indirect lighting shadows from the moving objects, making it feel grounded and more connected to the environment.
Although in this particular example, those shadows are barely noticeable because the character is not moving, it would make a huge difference once it starts moving around and getting close to the walls.

This is the result of combining the baked GI through the lightmass in the environment, plus the indirect lighting added through the lightmass importance volume.


RAYTRACED AMBIENT OCCLUSION
First thing you can notice when enabling indirect lighting in the scene is that, while you get very nice indirect shadows in the baked background, the character is missing all those indirect shadows and making it look wrong.
Enabling the raytracing ambient occlusion made the character look nicer but still quite incorrect since the occluded areas should have a directionality from bottom to top in a true raytraced GI. However having that raytraced occussion was still way better than without it.
A quite annoying thing though, was not being able to apply the occlusión to just the moving character since I ended up with "double indirect shadows" in the environment, the one coming from the accurately baked GI and the raytraced occlusion on top. I already missed that option in version 4.20 and the SSAO and I am looking forward to having control over those things through trace sets or something similar in the future.

SKY FILL MAIN DOOR
Besides getting direct sun light through the door, you also get a quite strong contribution from the sky. Although in UE 4.20 I would have definitely used a Sky Light to get nice soft shadows from the sky into the house, I chose to create a large bluish area light instead to get more artistic control over that light.
I also created a simple textured plane in the far background as matte painting to start connecting the fill light coming through the door with what we see through the windows.

ATMOSPHERE
With those ingredients, I had enough information to start playing around with the atmosphere and try to convey the feeling of depth.
Really nothing fancy about the height fog besides pushing back a little bit the starting distance and playing around with the density until I found something that felt right.

VOLUMETRIC LIGHTS
Something that I had quite clear since I started blocking out the lighting was that having a strong sun light coming through the door and an old house probaly placed in the middle of a desert area, was that the atmosphere had to be quite present. In that regard, adding a strong volumetric light coming through the door was going to help not only with the storytelling, but also with the composition of the image.
Although I tried using the same sun light to get the volumetric effect, I wasn´t quite happy with it and I decided to create a separated light to get control just over the volumetrics. It would be great to be able to create volumetric lights only in the future, but since that doesn´t seem to be possible at the moment, I just lowered the light intensity a lot to get the minimum diffuse contribution possible, and instead I increased the volumetric scattering of the light like crazy.
Although it makes totally sense to have just one height fog node for both, atmosphere and volumetric lights, it is true that once you have both in your scene, controlling them independently is kind of hard and dial them in takes more time that it should.

SKYLIGHT DOWNSTAIRS
When it comes to sky light coming through the background windows, I took advantage of the new raytraced area lights instead of the sky light again, just for the sake of having more artistic control over them and being able to tune the lights coming through those windows individually.
In this case I just placed an area light with the size of the window as close as possible to it to get the feeling of some natural sky light lighting that area.

SKYLIGHT UPSTAIRS
Once the main lighting and atmosphere was in place I started looking into the details. First thing you can notice when looking at the background of the image is that it completely lacks detail. There are very nicely shaded elements in that background that while you don´t want to make them stand out, you still can bring into the image to get more richness.
You can see how adding that window light helped shaping up the stairs that were completely missing without it as well as revealing the nice reliefs and picture frames in the right wall.

The setup for those lights was very simple, with one area light placed in front of the window like in the lower floor, and another one from the top, to fill the missing areas.

FILLING UP THE LIVING ROOM
The living room on the left, had the same issue as the far background of the house where you couldn´t really tell what was going on in there. In order to get some light on it I added just another area light as if it was coming from a window inside of that room. That light helped not only to distinguish what was inside of the room, but also to define different planes of depth.

KICKER LIGHT FOREGROUND
Since the screen left foreground elements and the interior of the living room were getting quite similar brightness values, I decided to add a spot light coming from behind to ad an extra bit of light those foreground elements and make them stand out over the living room room and interior.

CANDLE LIGHTS
Having candles in the scene itself was the perfect excuse to introduce new light sources, that in this case not only had a completely different color temperature than the other lights, but also a color temperature that was complementary to the blueish ambient color of the image.
The candle lights were just point lights with a fairly short attenuation radius and with a bit of volumetric scattering intensity to add some warm values to the atmosphere. Those candle lights and warm tones were also helping big deal to connect the two shots that were telling the story.

FRONTAL FILL LIGHT
In order to reduce the contrast slightly and reveal some details in the foreground elements I added a big area light with very low intensity behind the camera. Tha light was also incredible helpful to reveal all the metallic elements that the character is wearing and that were completely lost without that light. Another option that I miss in the lights is having the option to have specular lights only and than often times come in very handy.

CHARACTER RIM LIGHT
Last but not least, I added a kind of subtle rim light to the character to profiling his screen left area and help separating him from the background.

POST PROCESS EFFECTS
Once the lighting is done, it is time to start including the post process effects. In this case I just added the vignetting, bloom and lens flares effects, the last two being driven by a lens dirt image I got from internet. Playing with the post process values is just a matter of taste and although having them in the scene increase the richness and credibility, if they are too heavy handed they can be distracting and defeat the purpose.


PERFORMANCE
Since the main goal of the exercise was getting familiar with the lighting capabilities of the software and in this case the raytracing implementation, and I didn´t even had the hardware to properly test it, I was never constrained by the performance. However, I don´t see why with all the area lights baked and a proper rtx card, this shouldn´t run in real time.
Since the very beginning I knew that any shot I created was going to end up being rendered out as a video clip and being used to have renders taking hours to complete, having those images running in miliseconds or a few seconds didn´t matter at all to me.
CONCLUSSION
One of the main differences I found when using a game engine to do lighting from a cinematographic perspective is that lighting setups in videogames have to be generic, since the user decides were to go and were to look at, and the tools and approaches to lighting have been built around that concept. When trying to bend the tool towards a shot and camera driven approach it lacks of some nice features offline renders have, although it is getting better now that realtime area lights are available in the engine.